
Emergencies come without warning, and in those critical moments, having the knowledge to respond effectively can mean the difference between life and death. Cardiopulmonary Resuscitation (CPR) is one of the most essential life-saving skills that anyone can learn, and understanding how to perform it correctly and quickly can significantly increase a person’s chance of survival during cardiac arrest. This guide will walk you through how to learn CPR quickly and effectively, providing you with the core techniques you need to help save a life.
Why CPR is Crucial
Cardiac arrest occurs when the heart suddenly stops beating effectively, preventing blood from flowing to the brain and other vital organs. Without immediate intervention, a person can suffer permanent damage or die within minutes. CPR helps maintain oxygen-rich blood flow to the brain and vital organs until professional medical help arrives, significantly improving the odds of survival.
Research shows that performing CPR immediately after cardiac arrest can double or even triple a person’s chance of survival. Learning CPR is not just for healthcare professionals—it’s a skill that everyone can and should learn, as cardiac arrests often occur outside of hospitals, where immediate professional help is not available.
CPR Basics: What You Need to Know
CPR involves a series of chest compressions combined with rescue breaths to maintain circulation and oxygenation in the body. Modern CPR training emphasizes Hands-Only CPR, especially for bystanders without medical training, as it simplifies the process while remaining highly effective.
Here are the fundamental components of CPR:
- Chest Compressions: To manually pump the heart, allowing blood to circulate.
- Rescue Breaths: To provide oxygen to the lungs of the person in cardiac arrest.
For someone unfamiliar with CPR, focusing on chest compressions can be an effective and simple way to help in emergencies.
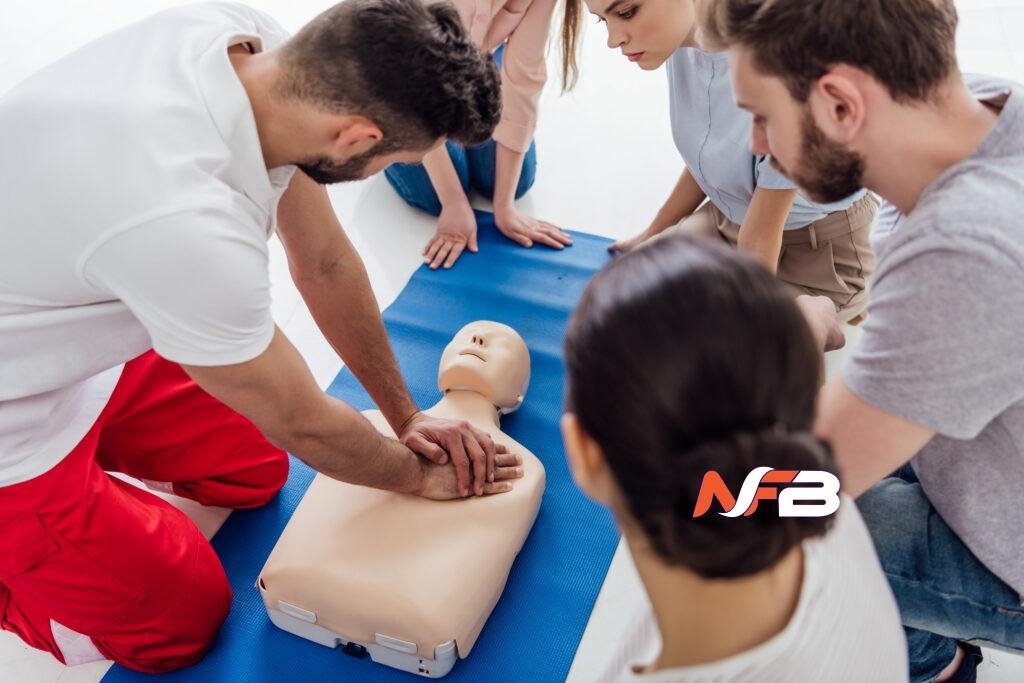
CPR Classes in Baltimore provide essential training in life-saving techniques such as chest compressions, rescue breathing, and AED use. They empower individuals with the knowledge to respond confidently during cardiac events, boost community safety, reduce anxiety in crises, and improve response times before professional help arrives, ultimately making a crucial difference in saving lives. Offered by organizations like the American Red Cross, these courses prepare participants to respond confidently during cardiac emergencies, increasing survival chances in critical situations. Enroll today to be prepared.
Step-by-Step Guide to Learning CPR Quickly
Step 1: Assess the Situation
Before performing CPR, you need to assess the situation quickly but thoroughly. This involves:
- Checking for Safety: Make sure the environment is safe for both you and the victim. For example, if the person is near traffic, ensure the area is clear of moving vehicles.
- Check for Responsiveness: Shake the person gently and shout loudly to determine if they are conscious. If the person does not respond, it’s time to take further action.
- Call for Help: If the person is unresponsive and not breathing normally, immediately call 911 (or have someone nearby do it). If an Automated External Defibrillator (AED) is available, have someone bring it to you.
Step 2: Hands-Only CPR
For laypeople without formal training, Hands-Only CPR is recommended by the American Heart Association (AHA). Hands-Only CPR consists of only chest compressions without rescue breaths. Here’s how to do it:
- Position Your Hands:
- Kneel beside the person’s chest.
- Place the heel of one hand in the center of their chest, between the nipples.
- Place your other hand on top, interlocking your fingers. Your shoulders should be directly above your hands.
- Start Compressions:
- Push hard and fast, at a depth of about 2 inches (5 cm) for adults.
- Perform compressions at a rate of 100-120 compressions per minute. A good rhythm to remember is to push in time with the beat of songs like “Stayin’ Alive” by the Bee Gees—songs that have a similar beat to 100-120 beats per minute.
- Allow the chest to fully recoil between compressions to allow the heart to refill.
- Continue Until Help Arrives:
- Keep pushing continuously until professional help arrives or the person shows signs of life, such as movement or breathing.
Step 3: CPR with Rescue Breaths (Optional)
If you have formal training or feel comfortable doing so, you can include rescue breaths. This is called Conventional CPR, and it involves the following steps:
- Open the Airway:
- After 30 chest compressions, tilt the person’s head back slightly to open the airway.
- Lift their chin to ensure the airway is clear.
- Give Rescue Breaths:
- Pinch the nose shut, seal your mouth over theirs, and give a breath for 1 second.
- Watch for the chest to rise as you give the breath.
- If the chest rises, give a second breath. If not, adjust the head position and try again.
- Resume Chest Compressions:
- Continue the cycle of 30 chest compressions and 2 breaths until help arrives or the person shows signs of life.
Using an AED: Enhancing CPR’s Effectiveness
An Automated External Defibrillator (AED) is a portable device that can analyze the heart’s rhythm and, if necessary, deliver a shock to help the heart reestablish an effective rhythm. AEDs are user-friendly and provide visual and audio prompts to guide you through the process.

How to Use an AED:
- Turn On the AED: Once you have the AED, turn it on immediately. The device will start giving voice prompts to guide you.
- Attach the Pads: Apply the pads to the victim’s bare chest as illustrated on the pads—one on the upper right side of the chest and the other on the lower left side.
- Analyze and Deliver a Shock:
- The AED will automatically assess the person’s heart rhythm and determine if a shock is needed.
- If advised, ensure that no one is touching the person, then press the “shock” button when prompted.
- Immediately resume CPR for about two minutes before the AED reanalyzes.
CPR for Different Age Groups
Adults:
- For adults, use both hands for chest compressions, pressing down approximately 2 inches.
- The compression rate should be 100-120 compressions per minute.
Children (Ages 1-8):
- Use one hand instead of two for compressions.
- Compress the chest to about 1.5 to 2 inches.
- If rescue breaths are performed, use a more gentle breath than you would for an adult.
Infants (Under 1 Year Old):
- Use two fingers instead of the full hand.
- Push down about 1.5 inches.
- Provide gentle rescue breaths, watching for the chest to rise.
Tips for Learning CPR Quickly and Effectively
- Take an Online Course: Numerous online courses provide an excellent way to learn CPR quickly. Platforms like the American Heart Association, Red Cross, and National CPR Foundation offer interactive videos and practice scenarios to help you grasp the essentials.
- Attend a Hands-On Class: A hands-on CPR class offers the best preparation for real-life situations. Practicing on mannequins helps you get a feel for the depth and rate of compressions.
- Practice with a CPR Dummy: Practicing on a CPR dummy is invaluable for developing muscle memory. Many community centers and first aid organizations provide classes with access to CPR dummies.
- Memorize Key Steps: Simplify the process in your mind by remembering:
- Check (the scene and responsiveness)
- Call (for help and an AED)
- Compressions (push hard and fast)
- Airway and Breaths (if confident and trained)
Overcoming Common CPR Hesitations
It’s natural to feel hesitant about performing CPR, especially if you’re worried about doing it wrong. Here are some common concerns and reasons why you shouldn’t hesitate:
- Fear of Hurting the Person: Chest compressions need to be deep and firm. It’s possible to break ribs during CPR, but that is far less serious than the consequences of not taking action during cardiac arrest.
- Uncertainty About Rescue Breaths: Hands-Only CPR is an effective and safe approach for bystanders, especially if you are not comfortable with mouth-to-mouth resuscitation.
- Fear of Disease Transmission: If you’re worried about disease transmission, Hands-Only CPR avoids mouth-to-mouth contact. Rescue breathing is generally more crucial for infants and young children, as their cardiac issues are often respiratory in nature.
Why It’s Worth Learning CPR
- Save a Life: Immediate CPR can double or triple a person’s chance of survival after cardiac arrest. The value of having this skill when a loved one or even a stranger collapses cannot be overstated.
- Be Ready for Real-Life Situations: Cardiac arrest is more common than many people think. Having CPR skills means that you are ready to act effectively in a critical moment.
- Community Impact: The more people in a community who know CPR, the safer everyone is. Prompt CPR saves lives, but every minute without it decreases the odds of survival by 10%.
Conclusion
Learning CPR quickly is entirely possible, and taking the time to equip yourself with this essential life-saving skill could make a difference in someone’s survival during an emergency. Whether you choose Hands-Only CPR or opt to learn full CPR with rescue breaths, what matters is taking action when it counts.
Practice the steps, memorize the basics, and remember the value of responding immediately in the face of cardiac arrest. By learning CPR, you are not only preparing yourself to save a life, but you are also contributing to a safer, more responsive community. Take the next step by enrolling in a CPR training course today, and be prepared to make a difference when it matters most.