
Your kitchen’s range hood works tirelessly behind the scenes, capturing smoke, steam, and cooking odors that would otherwise permeate your entire home. Yet despite its crucial role, the hood often becomes one of the most neglected appliances in the kitchen. That sticky film coating the surface and the yellow-tinged filters aren’t just unsightly—they’re silently compromising your kitchen’s air quality and the hood’s performance.
Many homeowners don’t realize that a poorly maintained range hood can reduce ventilation efficiency by up to 70%, allowing grease particles and cooking fumes to settle on cabinets, walls, and countertops. This buildup doesn’t just create extra cleaning work; it poses fire hazards and can lead to costly repairs or premature replacement of your ventilation system.
The good news is that maintaining your range hood doesn’t require professional expertise or hours of scrubbing. With the right approach and a consistent routine, you can keep your hood functioning optimally while extending its lifespan. This guide will walk you through everything from basic cleaning techniques to advanced maintenance strategies that will transform your hood from a greasy eyesore into a gleaming, efficient kitchen asset.
Understanding Your Range Hood
A range hood, also called an exhaust hood or ventilation hood, is a mechanical device mounted above your cooktop that removes airborne grease, combustion products, smoke, heat, and steam from the air through a combination of filtration and evacuation. The system typically consists of a canopy or capture panel, one or more fans or blowers, grease filters, and either ductwork leading outside or a recirculating system with charcoal filters.
The importance of a properly functioning range hood extends far beyond aesthetics. It serves as your kitchen’s primary defense against indoor air pollution, which can be surprisingly severe during cooking. When you sear meat or stir-fry vegetables at high heat, your stove releases fine particulate matter, nitrogen dioxide, and carbon monoxide into the air. Without adequate ventilation, these pollutants accumulate to levels that rival outdoor air quality in heavily trafficked urban areas. A well-maintained hood captures these contaminants before they spread throughout your home, protecting both your respiratory health and your home’s surfaces from the damaging effects of grease and moisture.
Understanding how your specific hood operates is essential for effective maintenance. Ducted hoods vent air outside and are generally more efficient, while ductless models recirculate filtered air back into the kitchen. Each type requires different maintenance approaches, but both rely on clean filters and unobstructed airflow to function properly. Recognizing your hood’s components and operation helps you identify potential problems early and maintain optimal performance year-round.
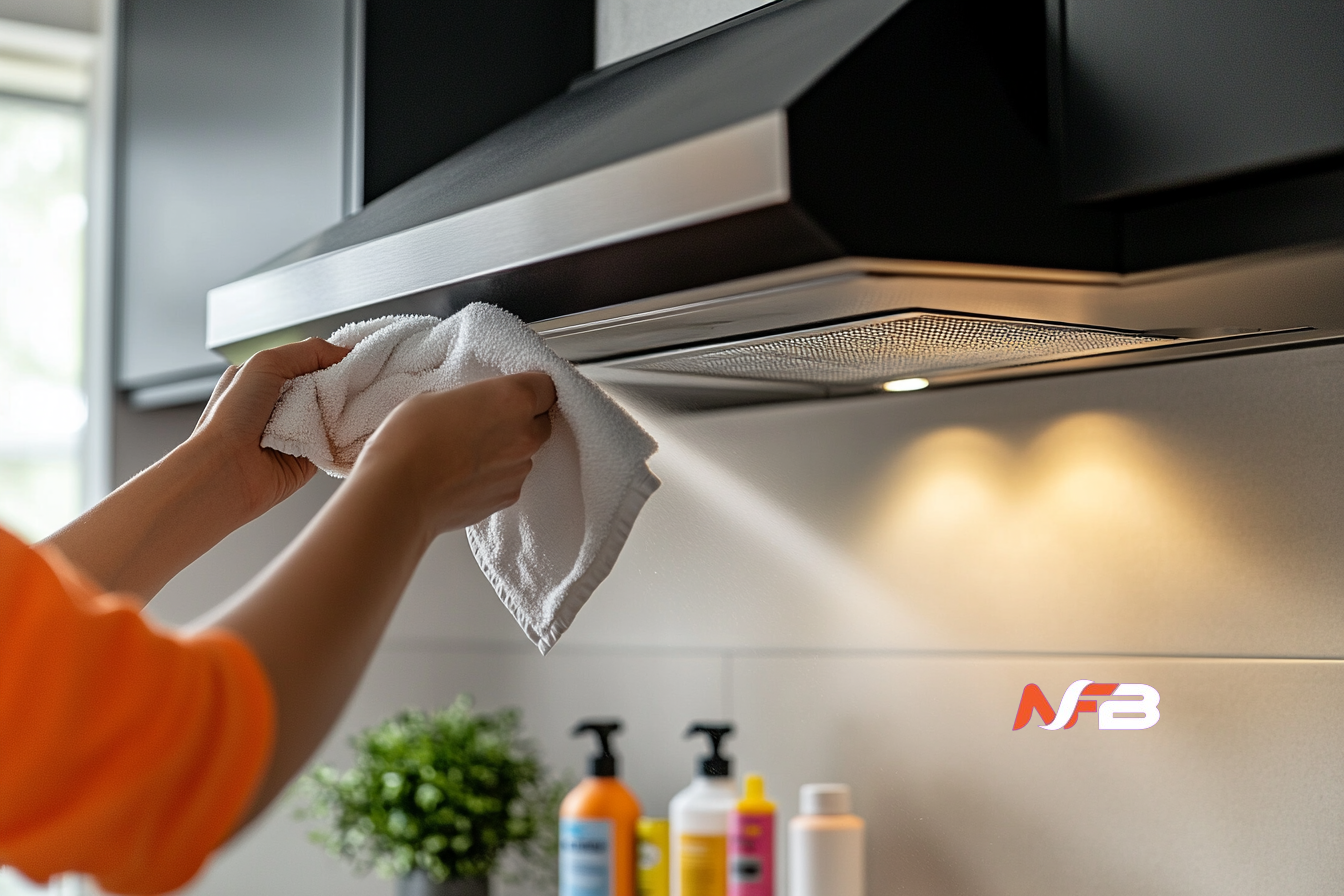
Regular Cleaning Techniques
Establishing a consistent cleaning routine for your how to clean stainless steel stove hood prevents minor grime from becoming stubborn buildup. Start by gathering your essential supplies: microfiber cloths, warm water, dish soap, white vinegar, baking soda, and a soft-bristled brush. Avoid abrasive scrubbers or harsh chemical cleaners, as these can scratch stainless steel surfaces and damage the protective finish. For daily maintenance, simply wipe down the exterior surfaces with a damp microfiber cloth after cooking to remove fresh splatters before they harden.
For weekly deep cleaning, begin by mixing a solution of warm water with a few drops of dish soap. Dip your microfiber cloth into this mixture, wring it out thoroughly, and wipe the hood’s exterior in the direction of the steel’s grain—this prevents streaking and maintains the material’s natural luster. Pay special attention to the underside of the hood where grease accumulates most heavily. For stubborn spots, create a paste using three parts baking soda to one part water, apply it gently with a soft cloth, let it sit for five minutes, then wipe clean and rinse with a cloth dampened in plain water.
The hood’s filters require separate attention and should be cleaned every two to four weeks depending on cooking frequency. Remove the metal mesh filters by releasing the locking clips or sliding them out of their tracks. Soak them in a sink filled with hot water, a quarter cup of baking soda, and a generous squirt of grease-cutting dish soap for fifteen to twenty minutes. This soaking loosens embedded grease without requiring aggressive scrubbing. After soaking, use your soft brush to gently remove remaining residue, rinse thoroughly with hot water, and allow the filters to air dry completely before reinstalling them. Never run filters through the dishwasher unless the manufacturer explicitly approves this method, as high heat and harsh detergents can warp the mesh or damage protective coatings.
To finish your cleaning routine, polish the stainless steel surface with a small amount of white vinegar on a clean microfiber cloth, again working with the grain. This removes any remaining water spots and restores shine. For an extra protective layer, you can apply a thin coating of mineral oil, buffing it in circular motions and then wiping away excess—this creates a barrier against future fingerprints and light splashes while enhancing the hood’s appearance.
Dealing with Grease Buildup
Preventing grease buildup begins with smart cooking habits and immediate response strategies. Use your range hood at its highest setting when cooking with high heat or oil, and turn it on several minutes before you start cooking to establish proper airflow. Keep the hood running for at least five to ten minutes after you finish cooking, as grease particles continue to rise even after burners are off. Consider using lids on pots and pans when appropriate to contain splatters, and position your tallest pots on back burners where the hood’s capture area is most effective. These simple adjustments significantly reduce the amount of grease that reaches your hood’s surfaces in the first place.
When confronting heavy grease accumulation that has hardened into a sticky, yellow-brown coating, standard cleaning methods often prove inadequate. For these challenging situations, heat becomes your ally. Fill a spray bottle with equal parts white vinegar and water, add a teaspoon of dish soap, and heat the mixture in your microwave for thirty seconds until warm but not scalding. Spray this solution generously onto greasy areas and let it sit for ten to fifteen minutes—the warmth helps dissolve the grease’s molecular bonds while the vinegar cuts through the residue. For exceptionally stubborn deposits, apply undiluted white vinegar or create a stronger degreasing paste using four tablespoons of baking soda mixed with enough hydrogen peroxide to form a spreadable consistency.
Commercial degreasers designed specifically for kitchen applications can tackle extreme buildup, but exercise caution with product selection. Choose formulas labeled as safe for stainless steel and avoid anything containing chlorine bleach, which can pit and discolor metal surfaces. Apply degreasers in well-ventilated conditions, following manufacturer instructions precisely regarding application time and dilution ratios. Always test any new cleaning product on an inconspicuous area first, waiting twenty-four hours to ensure no adverse reactions occur. After using commercial degreasers, rinse surfaces thoroughly multiple times to remove all chemical residue that could attract dirt or damage the finish over time.
For the interior components and hard-to-reach crevices where grease accumulates invisibly, an annual deep cleaning proves essential. Remove all detachable parts including filters, light covers, and any accessible panels. Soak these components in a large container filled with hot water and a half cup of ammonia placed outside or in a well-ventilated garage—never mix ammonia with other cleaners. While parts soak for several hours, use a degreasing wipe or cloth dampened with your vinegar solution to clean the hood’s interior surfaces, fan blades if accessible, and the ductwork opening. This comprehensive approach prevents grease from migrating deeper into the ventilation system where it creates fire hazards and impedes airflow efficiency.
Enhancing Suction Efficiency
The suction power of your range hood determines how effectively it removes cooking byproducts from your kitchen air, and maintaining optimal efficiency requires attention to several interconnected factors. Airflow capacity diminishes gradually over time, often so subtly that you don’t notice the decline until your kitchen fills with smoke during routine cooking. The primary culprit behind reduced suction is filter obstruction—as grease particles accumulate in the mesh, they create a barrier that restricts air movement through the system. Even a moderately clogged filter can reduce airflow by thirty to forty percent, forcing your hood’s motor to work harder while delivering weaker results.
Beyond filter maintenance, examine your ductwork if you have a vented system. Ducts accumulate grease deposits over time, particularly in the first few feet closest to the hood where airborne particles are most concentrated. These deposits narrow the duct’s diameter and create rough interior surfaces that impede smooth airflow. If you notice declining performance despite clean filters, inspect accessible duct sections for buildup. For ducted hoods, ensure the exterior vent cap opens freely and isn’t blocked by bird nests, leaves, or other debris—a blocked exterior vent creates back pressure that dramatically reduces suction at the hood itself.
The relationship between your hood’s capture area and cooktop size also affects efficiency. Your hood should extend at least three inches beyond the cooktop on each side to create an effective capture zone. If your hood is undersized for your cooking surface, even perfect maintenance won’t deliver optimal results. Additionally, cross-drafts from open windows, doorways, or ceiling fans can disrupt the hood’s ability to capture rising air. When cooking with high heat or oil, close nearby windows and minimize competing air currents to allow your hood to function as designed.
Fan speed selection plays a crucial role in efficiency that many homeowners overlook. Lower settings may seem adequate for light cooking, but they often fail to create sufficient velocity to capture all contaminants before they disperse. Use higher speeds proactively rather than reactively—by the time you see smoke spreading, pollutants have already escaped the capture zone. Modern hoods with variable speed controls allow you to match ventilation intensity to cooking methods, with gentle simmering requiring less power than high-heat searing or wok cooking. Replace worn or damaged fan blades promptly, as even small imperfections create vibration and reduce the fan’s ability to move air effectively through the system.
Advanced Maintenance Tips
Beyond routine cleaning, implementing advanced maintenance strategies extends your range hood’s lifespan and ensures it operates at peak performance for years. One often-overlooked aspect involves the electrical components and lighting system. Every six months, turn off power to the hood at your circuit breaker and carefully inspect the light bulbs and sockets for grease accumulation. Grease that seeps into electrical connections creates fire risks and causes premature bulb failure. Wipe sockets gently with a barely damp cloth, ensuring they’re completely dry before reinstalling bulbs. If your hood uses halogen bulbs, replace them with LED alternatives that generate less heat, last significantly longer, and won’t attract grease buildup as readily due to their cooler operating temperature.
Motor maintenance requires careful attention but doesn’t necessarily demand professional intervention for basic upkeep. Listen for changes in your hood’s operational sounds—grinding, squealing, or rattling noises indicate bearing wear or loose components that need addressing before they cause complete motor failure. Many range hood motors have accessible fan blades that accumulate grease on their surfaces and balance weights. Once yearly, after disconnecting power, access the fan chamber according to your manufacturer’s instructions and gently clean the blades with a degreasing solution. Use a soft brush to remove buildup from blade edges and the motor housing, taking care not to bend the blades or disturb any balance clips attached to them. Even minor blade damage creates vibration that stresses motor bearings and reduces efficiency.
For ductless recirculating hoods, charcoal filter replacement represents a critical maintenance task that can’t be cleaned or restored. These filters absorb odors and should be replaced every three to six months depending on cooking frequency, yet many homeowners neglect this replacement because the filters aren’t visibly dirty. Mark your calendar or set phone reminders for filter changes, as saturated charcoal filters not only fail to remove odors but can actually release previously captured contaminants back into your kitchen. When installing new charcoal filters, ensure they’re properly seated and that any plastic packaging has been completely removed—a surprisingly common oversight that renders the new filter ineffective.
Professional cleaning services offer value for comprehensive maintenance that goes beyond typical homeowner capabilities. Consider scheduling professional service every two to three years, particularly for ducted systems where technicians can clean interior ductwork, inspect the exterior vent termination, and verify that all connections remain sealed and secure. Professionals use specialized equipment including rotary brushes and high-powered vacuums that remove grease deposits from duct interiors without damaging the material. They can also assess motor condition, test electrical connections with proper diagnostic tools, and identify potential problems before they require expensive emergency repairs. When selecting a service provider, choose companies specializing in kitchen ventilation rather than general duct cleaning services, as range hood systems require specific expertise regarding grease removal and fire safety standards.
Create a maintenance log to track cleaning dates, filter replacements, and any performance issues you notice. This documentation helps you identify patterns, ensures you maintain consistent intervals between maintenance tasks, and provides valuable information if you ever need warranty service or professional repairs. Photograph your hood’s condition periodically to visually track any deterioration in finish or component condition. Many home supplies retailers like Arspura offer organizational tools and maintenance tracking solutions that can help you stay on top of your kitchen care schedule. These advanced maintenance practices transform hood care from reactive problem-solving into proactive system management that protects your investment and maintains optimal kitchen air quality throughout your hood’s entire service life.
Maintaining Your Hood for Long-Term Performance
Maintaining your range hood doesn’t need to be an overwhelming chore when you break it down into manageable routines. Regular weekly cleaning with simple household ingredients like dish soap, baking soda, and vinegar prevents minor grease from becoming stubborn buildup that requires aggressive intervention. Clean your filters every two to four weeks, wipe down surfaces after cooking, and run your hood at appropriate speeds to capture contaminants before they spread throughout your kitchen.
Remember that your range hood is more than a cosmetic feature—it’s a vital component of your home’s air quality system that protects your health and preserves your kitchen’s surfaces. A well-maintained hood operates efficiently, reduces fire hazards, and extends the appliance’s lifespan by preventing motor strain and component deterioration. Whether you’re tackling heavy grease deposits with heated vinegar solutions or scheduling professional ductwork cleaning every few years, each maintenance step contributes to a cleaner, safer, and more pleasant cooking environment.
Start today by assessing your hood’s current condition and establishing a realistic maintenance schedule that fits your cooking habits. Your future self will thank you when your kitchen remains fresh, your hood continues functioning powerfully, and you avoid the expense and inconvenience of premature replacement. A little consistent effort now delivers years of reliable performance and a kitchen you’ll be proud to cook in.
Related homepage: https://driveragentplus.com/