The quality of your coffee begins long before water touches the grounds. At the heart of every exceptional cup lies a precisely calibrated coffee grinder, and within that grinder, the inner burr positioning plays a crucial role that many coffee enthusiasts overlook. Whether you’re experiencing inconsistent extraction, uneven particle distribution, or simply want to unlock your grinder’s full potential, understanding how to properly position the inner burr can transform your brewing results. This seemingly technical aspect of grinder maintenance is actually more accessible than most people realize, and mastering it can mean the difference between mediocre coffee and cafe-quality beverages at home. In this comprehensive guide, we’ll demystify inner burr positioning, explore why it matters so much for your daily brew, and walk you through the practical steps to optimize your grinder’s performance for consistently excellent coffee.
Understanding Your Coffee Grinder
What is Inner Burr Positioning?
Inner burr positioning refers to the precise alignment and placement of the stationary burr inside your coffee grinder relative to the outer rotating burr. In most burr grinders, one burr remains fixed while the other rotates to crush coffee beans between them. The inner burr typically sits on a central shaft and must be properly seated and aligned to ensure the burrs maintain consistent spacing around their entire circumference. When correctly positioned, the two burrs create a uniform gap that produces evenly sized coffee particles. This positioning isn’t just about how tight or loose the burrs are set—that’s your grind setting—but rather about whether the inner burr sits perfectly centered and level on its mounting point. Even a fraction of a millimeter of misalignment can cause one side of the burrs to touch while leaving excessive space on the opposite side, resulting in a mix of powder-fine particles and larger chunks in the same grind. Proper inner burr positioning ensures that when you adjust your grind setting, the entire burr surface maintains that chosen distance uniformly, giving you the consistency that quality coffee extraction demands.
The Importance of Inner Burr Positioning
Impact on Grind Quality
The relationship between inner burr positioning and grind quality is direct and undeniable. When your inner burr sits perfectly aligned, every coffee bean passes through an identical gap regardless of where it enters the burr set, resulting in uniform particle size distribution that’s essential for balanced extraction. Misaligned burrs create what coffee professionals call “bimodal distribution”—a grind profile with both very fine dust and larger chunks simultaneously present. This inconsistency wreaks havoc during brewing because the fine particles over-extract quickly, contributing bitterness and astringency, while larger pieces under-extract, adding sour and grassy notes to the same cup. The result is a muddled, unbalanced flavor profile that no brewing technique can fully correct. Proper inner burr positioning eliminates this problem by ensuring mechanical precision translates directly to particle uniformity. You’ll notice the difference immediately in your coffee’s clarity, sweetness, and balance. Espresso drinkers will find channeling issues dramatically reduced as water flows evenly through a uniform puck, while pour-over enthusiasts will achieve more predictable drawdown times and cleaner flavor separation. The investment of time in correctly positioning your inner burr pays dividends in every cup you brew, transforming your grinder from a simple bean crusher into a precision instrument that respects the nuanced flavors locked within quality coffee beans.
How to Adjust Inner Burr Positioning
Step-by-Step Guide
Adjusting your inner burr positioning requires patience and attention to detail, but the process is straightforward once you understand the mechanics. Begin by unplugging your grinder and removing the hopper to access the upper burr carrier. Most grinders secure the inner burr with a central screw or locking mechanism—consult your manual if the removal method isn’t immediately obvious. Once you’ve removed the inner burr, thoroughly clean both burrs and the mounting surfaces with a soft brush to eliminate any coffee residue that might prevent proper seating. Inspect the burr carrier and shaft for any debris or damage that could affect alignment. When reinstalling the inner burr, place it gently onto the shaft without forcing it, ensuring any alignment tabs or notches match their corresponding slots. This is the critical moment: the burr should sit flush against its mounting surface with no gaps or tilting. Thread the retention screw by hand initially, checking that the burr remains level as you begin tightening. Tighten the screw firmly but avoid overtightening, which can warp the burr carrier or crack the burr itself. After securing the burr, manually rotate the adjustment collar through its full range while listening for any scraping sounds that indicate misalignment. If you hear contact between burrs at any point, remove and reseat the inner burr, checking again for debris or improper seating. Once satisfied with the positioning, run a small amount of coffee through at a medium setting to verify smooth operation before returning to your preferred grind size.
Common Issues and Troubleshooting
Grind Setting Issues
When your grind settings don’t behave as expected, the culprit often traces back to burr positioning rather than the adjustment mechanism itself. One frequent issue is the inability to grind fine enough for espresso, even when the adjustment collar is set to its finest position. This typically indicates the inner burr sits too high or tilted away from the outer burr, preventing the burrs from achieving close contact. Conversely, if your grinder produces acceptable results at coarser settings but struggles or stalls when adjusted finer, the burrs may be misaligned in a way that causes uneven contact—some areas touching while others maintain proper clearance. Another common problem manifests as inconsistent grind output where the same setting produces different results from session to session. This instability often stems from a loose inner burr that shifts slightly during operation, changing the effective burr gap unpredictably. You might also notice that adjusting from coarse to fine feels smooth, but returning to coarser settings leaves the grinder producing finer particles than expected. This “sticky” adjustment behavior suggests the inner burr isn’t properly centered, causing the adjustment mechanism to work against uneven resistance. To address these issues, remove and reinstall the inner burr following proper seating procedures, ensuring the mounting surface is completely clean and the burr sits absolutely flat before tightening the retention screw with appropriate but not excessive force.
Inner Burr Positioning Errors
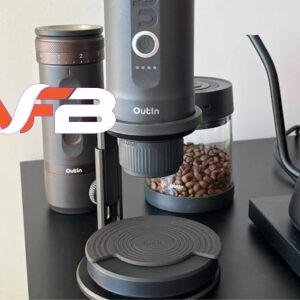
Recognizing and correcting inner burr positioning errors requires understanding the symptoms that indicate misalignment. The most obvious sign is audible burr contact—a scraping, grinding, or chirping sound during operation that shouldn’t exist when burrs are properly positioned and set to an appropriate grind size. If you hear metal-on-metal contact at any grind setting coarser than the finest espresso range, your inner burr is definitely misaligned. Visual inspection can reveal positioning errors as well: with the grinder unplugged and hopper removed, slowly rotate the outer burr by hand while observing the gap between burrs with a flashlight. The space should remain uniform as you rotate through 360 degrees—any variation indicates the inner burr sits off-center or tilted. Another diagnostic approach involves the “marker test” where you color the inner burr’s grinding surface with a washable marker, run the grinder briefly at a coarse setting without beans, then examine the wear pattern. Uneven marker removal indicates contact points where alignment is incorrect. When repositioning fails to resolve these issues, inspect the burr carrier itself for wear, damage, or debris lodged in mounting grooves. Some grinders, including portable models from brands like OutIn designed for travel use, use shims or washers to achieve proper burr height—verify these components are present and correctly installed. In cases where the mounting shaft shows wear or the burr carrier threads are damaged, professional service may be necessary as these underlying mechanical issues prevent accurate positioning regardless of your adjustment technique.
Achieving Consistent Coffee Excellence Through Proper Burr Alignment
Mastering inner burr positioning elevates your coffee grinder from a functional appliance to a precision tool that consistently delivers the grind quality your beans deserve. While the technical aspects might initially seem daunting, the process of properly seating and aligning your inner burr is a manageable skill that pays immediate dividends in cup quality. The difference between correctly and incorrectly positioned burrs manifests in every aspect of your coffee—from the clarity and balance of flavor to the predictability of your brewing process. By taking time to understand how your grinder’s burr assembly works, recognizing the symptoms of misalignment, and following proper installation procedures, you gain control over one of the most critical variables in coffee preparation. Regular maintenance and periodic checks of your burr positioning ensure sustained performance and protect your investment in quality equipment. Whether you’re troubleshooting existing issues or simply optimizing an already functional grinder, the knowledge you’ve gained here empowers you to extract the full potential from every bean. Your morning ritual deserves this level of attention to detail, and your palate will thank you for the consistently exceptional coffee that proper inner burr positioning makes possible.


Leave a Reply